WEEK FOUR


June 22, 2009


Last week I looped through 42 time intervals ( I only placed 31 intervals up to 2:06:20. I don't know if I should have more time intervals) with set parameters and saved them as a fits file thinking I would be able to restore all of the information today. Unfortunately, I had run into several problems when I tried to restore the parameters from the script and when I tried to restore the fits file. I visited
Kim's OSPEX write up  that was suggested by the

author of the OSPEX Basics tutorial:


Saving and Restoring OSPEX Session

The writescript method saves an OSPEX session.  Internally, there are two steps to saving an OSPEX session:

   1. Storing the current value of all control parameters that are not at their current value.  This is accomplished by writing a procedure script that creates an OSPEX object and issues the SET command for each of those changed parameters.
   2. Saving the result of fitting that has been done.  This is accomplished by writing all of the fit results parameters (all info parameters starting with spex_summ) into an output file (FITS format).  (See the section on Saving and Restoring OSPEX Results to see how to do this step by itself.)

In the OSPEX GUI, use the buttons under File to 'Write Script'.  Additional buttons let you choose whether to write a fit results file as well as the script file.  A widget will appear to allow you to choose the names for the script file and the fit results file.  The name of the procedure will be the name of the script file you select.

At the command line, type (see the writescript description for calling arguments):

    o -> writescript

To run the script to restore the session, type

    script_name, obj=obj

If obj is an existing OSPEX object, then the procedure will set the parameters in that object to the values they had when you wrote the script (Note - parameters not mentioned in the script will be unchanged, they will not be initialized).  If not, the procedure will create a new OSPEX object and set the parameters/values.  Depending on how you wrote the script, it may start the GUI, and and it may restore the fit results.

In addition, there is a button on the GUI under File to 'Set Parameters from Script' to allow you to set parameters in an existing object according to the script file (either initializing all parameters to defaults first or not).   At the command line, type:

    o->runscript  or   o->runscript, /init

If o is an existing object, then script_name,obj=o is equivalent to o->runscript.
Saving and Restoring OSPEX Results

The fit results are saved via the OSPEX savefit method which writes all of the fit results parameters (all info parameters starting with spex_summ) into a file.  They are restored into the OSPEX object via the restorefit method which reads the file and uses the SET method to set the spex_summ parameters into the object. They are restored to your IDL session via the spex_read_fit_results routine.

Two types of output file are supported:

    * FITS - This is the preferred format.  FITS is a standard format and can be read by FITS readers in many languages; it does not require IDL or SSW.  Another advantage of the FITS format is that context information (including most of the OSPEX control parameter values) is included in the FITS file.  The disadvantage is that the files are bigger than the geny files.
      
    * Save (geny) - No longer supported as of 7-May-2006.  The geny files are a refinement of the basic IDL save files, written and read by the SSW routines savegenx and restgenx.  They are smaller than the FITS files, but the format is specific to IDL/SSW.

In the OSPEX GUI, use the buttons under File to 'Save Fit Results' and 'Import Fit Results'.

At the command line, type the following to save the fit results or restore fit results into the OSPEX object:

    o -> savefit
    o -> restorefit

Note that it is possible to include restoring the fit results as part of a script that restores an OSPEX session (see section on Saving and Restoring OSPEX Session)

To restore the fit results structure directly (without creating an OSPEX object) from either a FITS or geny file, use the spex_read_fit_results procedure.  For example,

    fit_results = spex_read_fit_results('ospex_results.fits')

(Geny files can also be read in directly using the restgenx command:  restgenx, file='ospex_results.geny', fit_results  )

The structure containing all of the fit results will be returned in the fit_results variable.  Look at the parameters starting with spex_summ in the OSPEX Info Parameter Table for the meaning of each tag in the structure. 


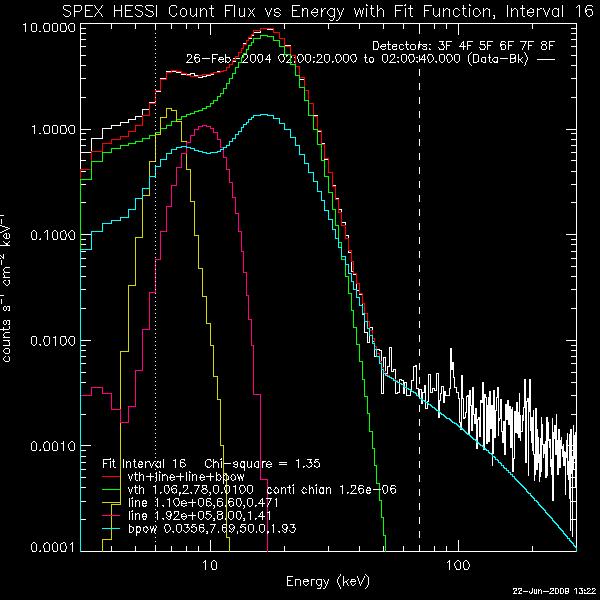
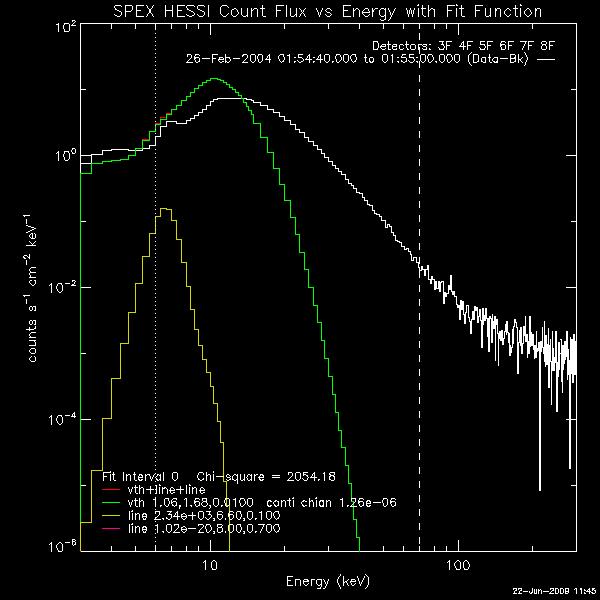
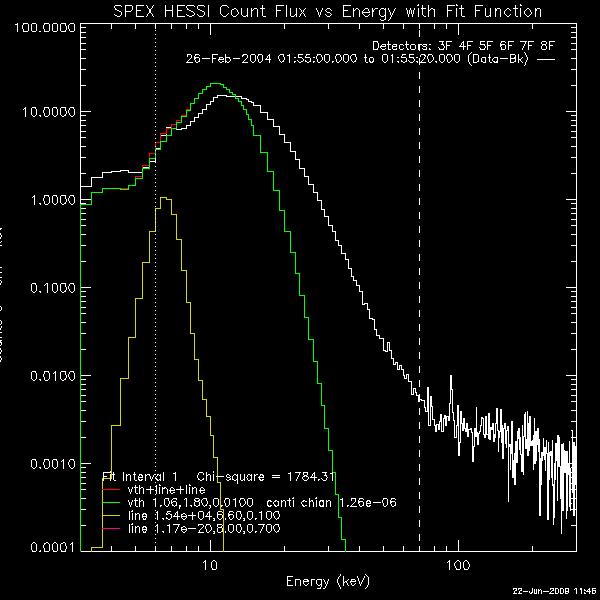
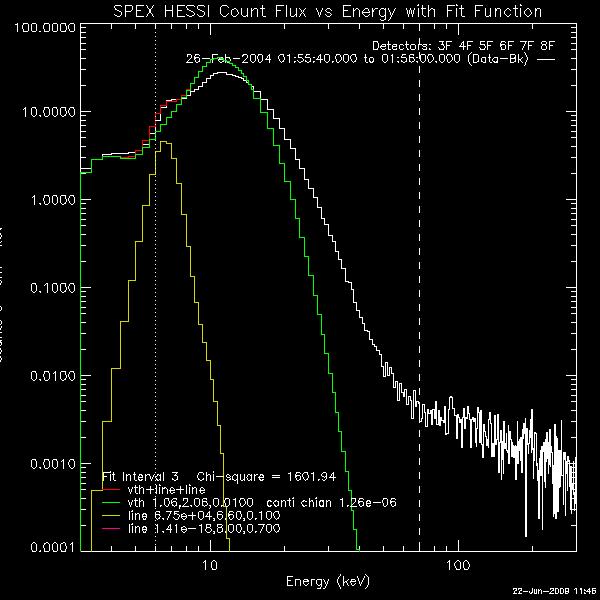
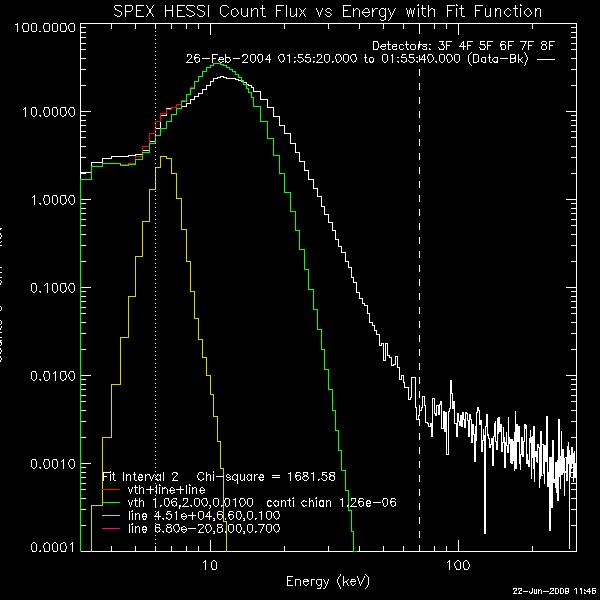
I finally had all the intervals looped through with the thermal and 2 Gaussian line components.
   
Intervals 0-3
Time Start- 1:54:40
Time End-1:55:40


Intervals 4-7
Time Start- 1:56:00
Time End-1:57:40


Intervals 8-11
Time Start- 1:58
Time End-1:59:00


Intervals 12-15
Time Start-1:59:20
Time End-2:00:20


Intervals 16-19
Time Start-2:00:20
Time End-2:01:40


Intervals 20-23
Time Start-2:01:40
Time End-2:03:40


Intervals 24-27
Time Start-2:03:40
Time End-2:05:00


Intervals 28-31
Time Start-2:05:00
Time End-2:06:20


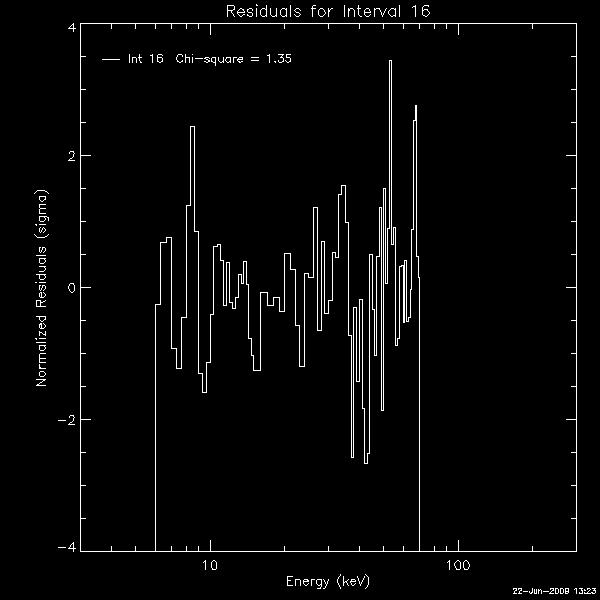
I then added the Broken Power Law Component and made one image. I want to be sure the fit is suitable.......


June 23, 2009


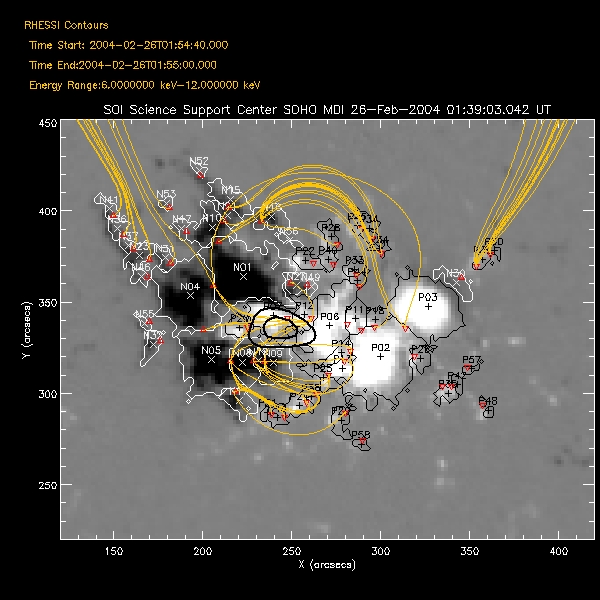
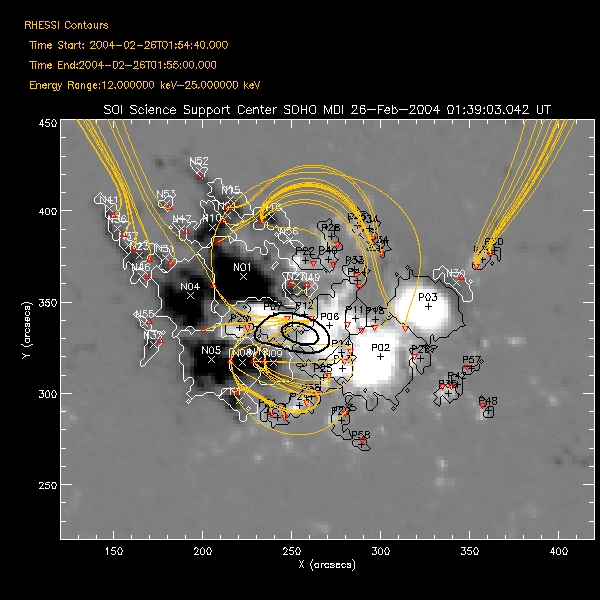
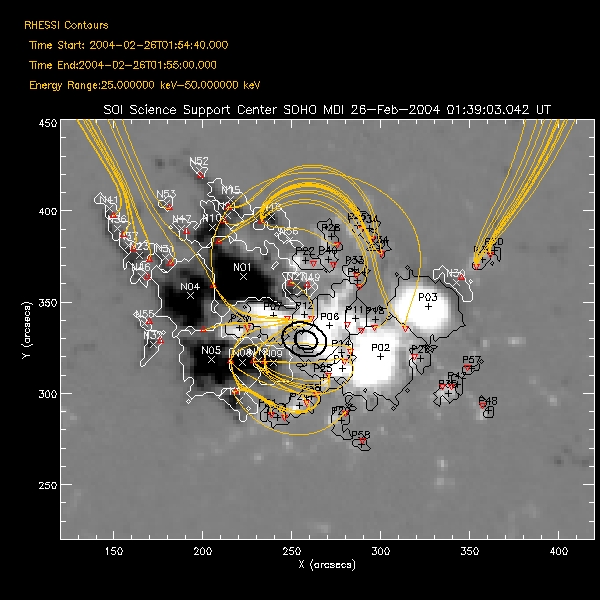
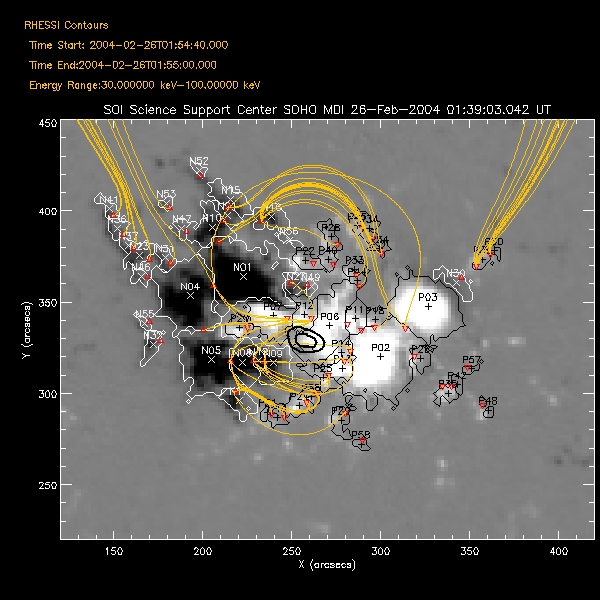
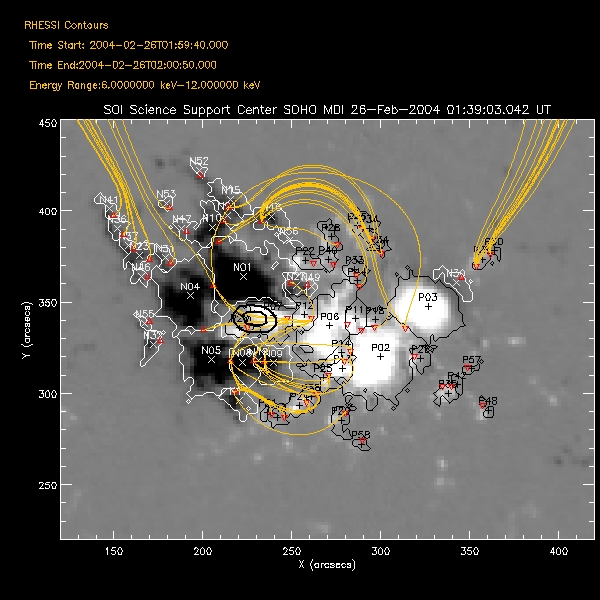
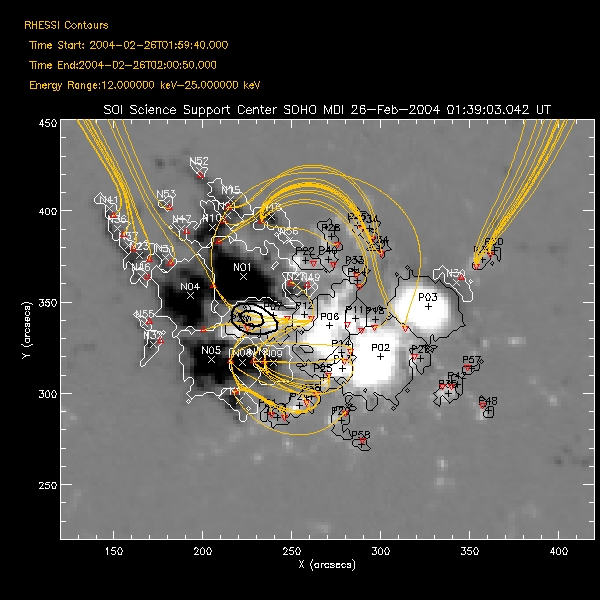
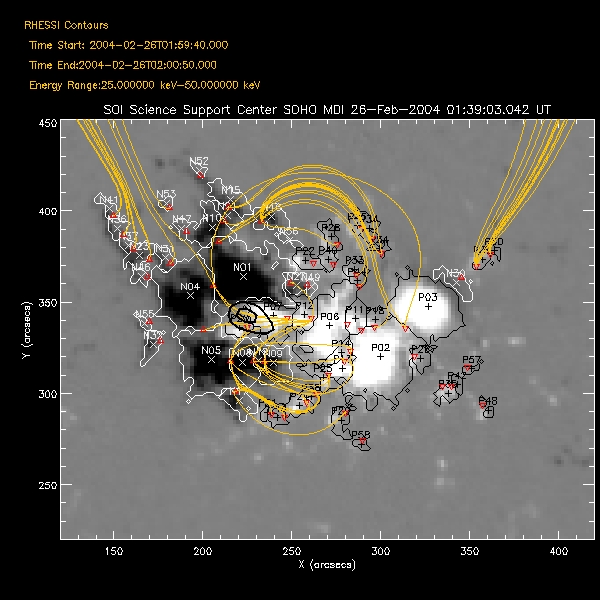
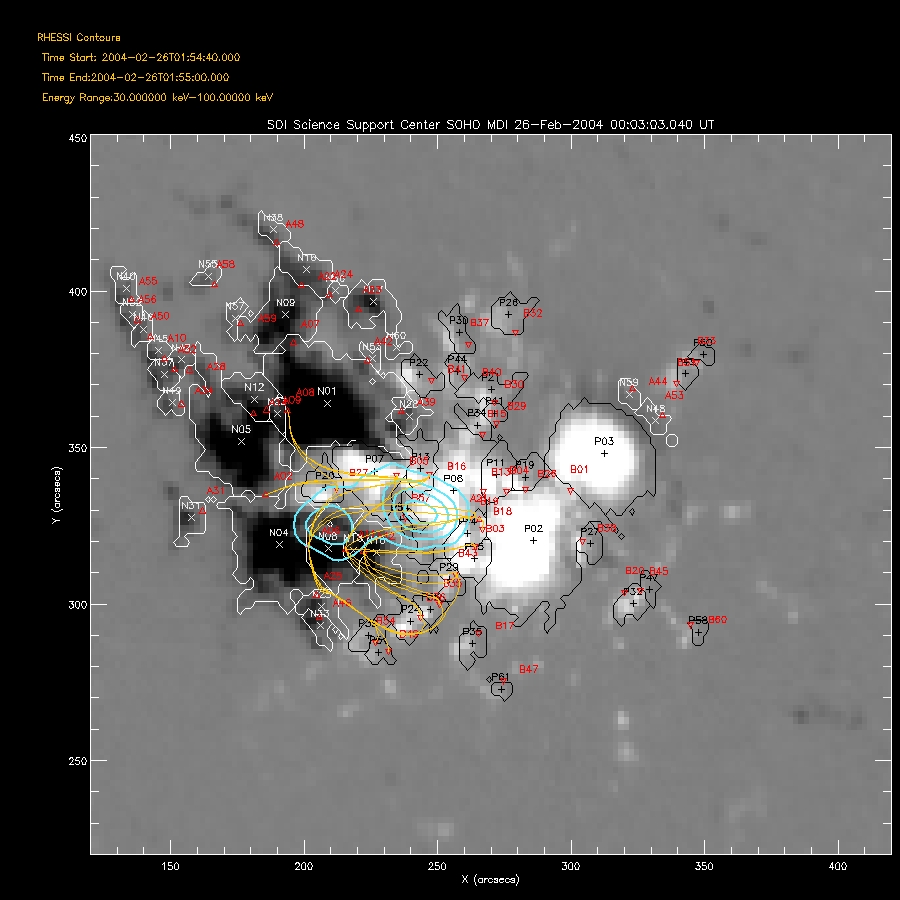
I completed my mpole overlay program and have added some handy features that made the process easier for me to make several overlays.


Added Features:


Dialog_pickfile command - This allows me to pick a certain kind of file (i.e. .fits) from the selected directory.  Now every time I run my program a GUI pops up and I can pick the desired fits file I want.


Str=sxpar(header,’TITLE’)- This command pulls a string from the header of the selected fits file. I found this command through a program Dana Loncope created and I then traced the command information in xdoc to fully understand how to use this command.


XYPLOTS- This command allowed me to place a title on the plot. I combined sxpar and xyplots  to create an automatic title for the RHESSI contours on each of the overlays I created.


I still don’t fully have the mask on perfectly but I think it should be fine for now.


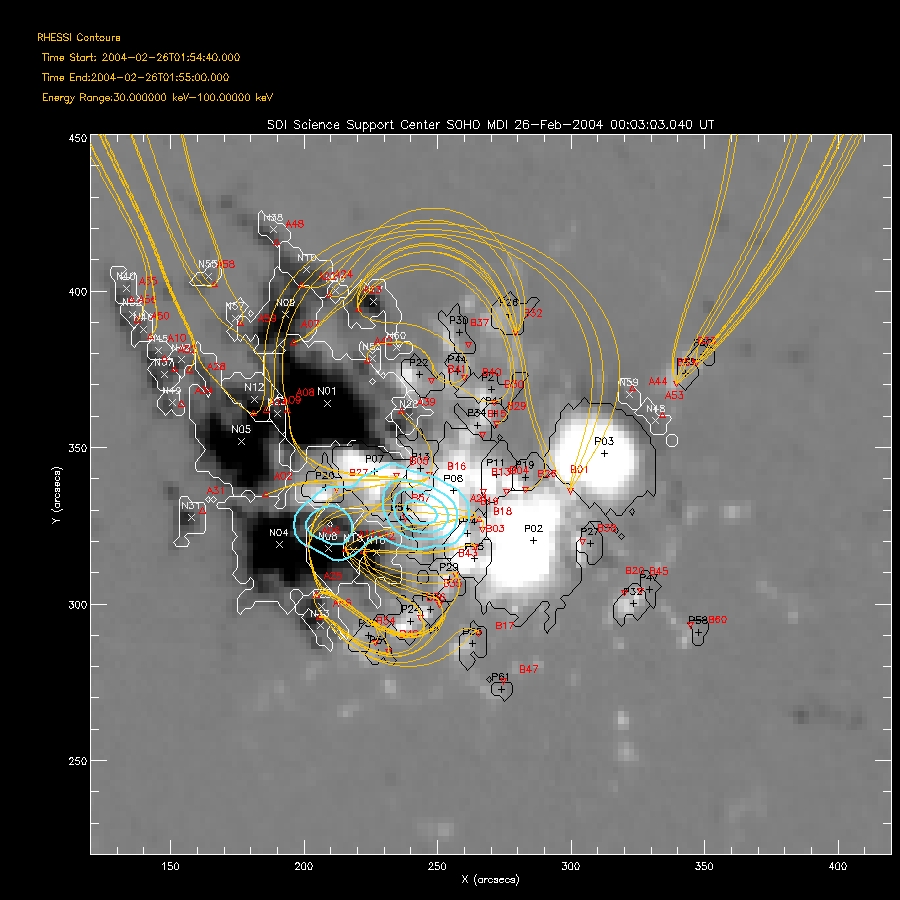
Time Start- 1:54:40
Time End- 1:55:00


Time Start- 1:57:40
Time End- 1:58:30


Time Start- 1:58:30
Time End- 1:59:40


Time Start- 1:59:40
Time End- 2:00:50


June 24,2009


OSPEX did not work properly again today but I now have several solutions to try tomorrow in order to see if it is the program or the Xwin program.

My goal for the day was to:


 - try to identify the separators that near the foot points in the 30-100 keV RHESSI images

-make another PNS file for an earlier time period, the earliest time is 00:03:03 UT


I was able to complete a pns file for the early magnetogram but when I tried making it into a program I was having issues with the read pns file command. I think I might have to redo the topology and make a new file.   I spent some time looking through the array of the nulls and separators to find a way to locate the separator number and the null its connected to.  


I continued to read journal articles about Super- Hot Thermal Components and seem to have more questions than answers  but  tomorrow I have the chance to pick Dick Canfields brain.


June 25, 2009

Today was an information filled day from the morning to the afternoon. In the morning Jiong presented a lecture on Solar flares and she used Maxwell’s equations to show us how magnetic reconnection works on a theoretical level.  After the lecture I spoke with Dick Canfield and now I have a better understanding of how to find a “Super Hot Thermal Component” through OSPEX and a grasp on the theory.
I figured out that OSPEX may not be working due to the Xwin program on the PC .  I worked on a MAC and the GUI was fine and acting normal.

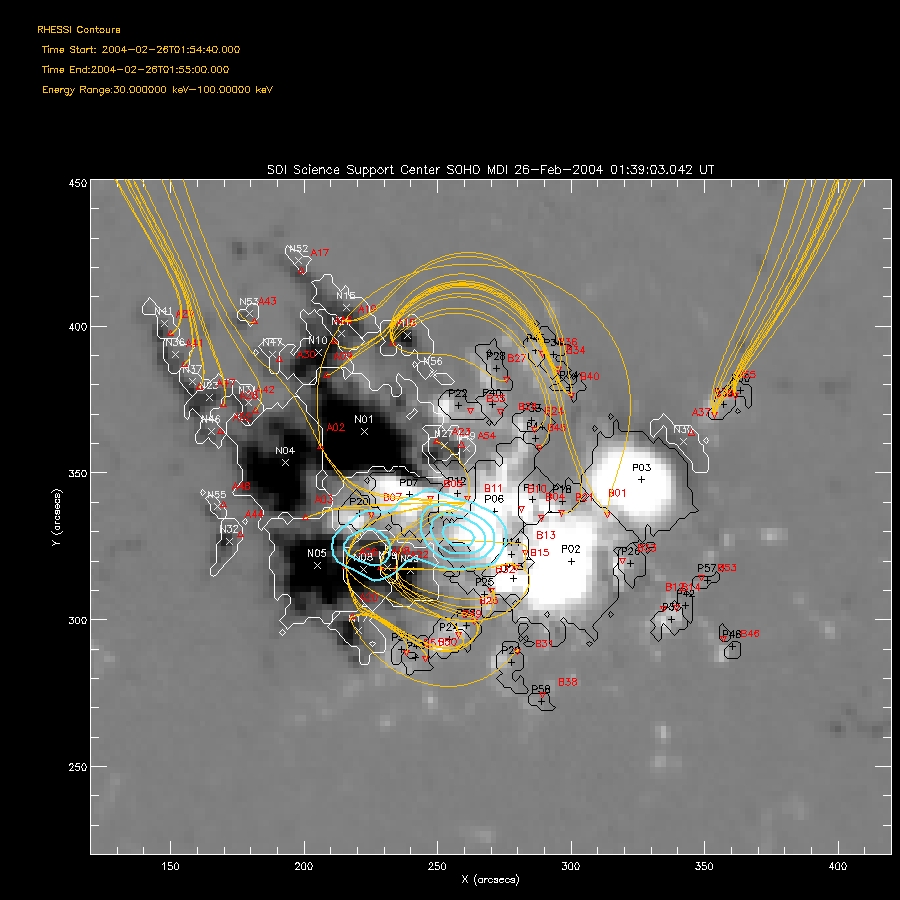
I spent the rest of the day fixing programming issues with my new magnetogram and identified the separators that are near the RHESSI contours.


                 Separators [0:61]                                                         I
dentified   Separators [2:24] & [45:50] around the Footpoint.   


June 26, 2009


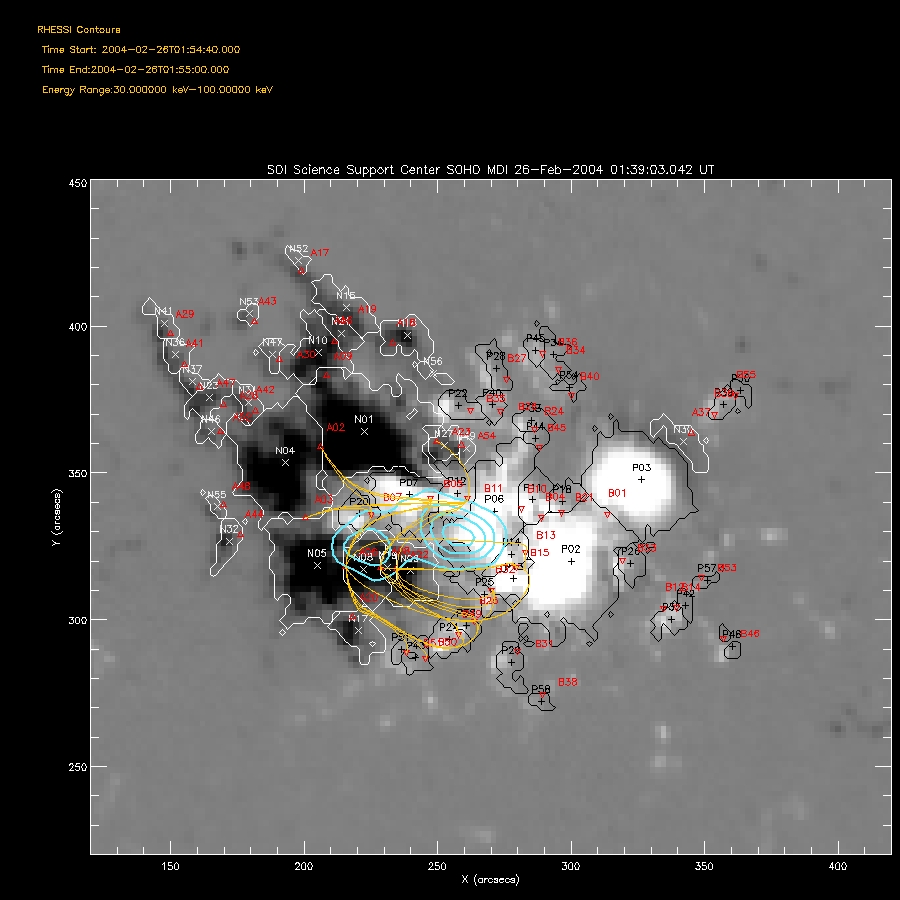
Identified   Seperators [0:12], [16:18], & [21:32] around the Footpoint.


Comparing the two images with different magnetogram time.


>